| Plan: All plans |
Setting up event types empowers you to apply different settings for different types of events. For example, your default length for a phone call might be different from your default length for an in-person meeting. Therefore, you'll want these varying settings to be reflected when someone is trying to book an event with you via the scheduler feature.
To set up event types, go to the event types page within the scheduler setup.
By default, you'll see Live Interview as an event type. This refers to the live video interview feature on Spark Hire. When you approve a request for a Live Interview via the scheduler, it will automatically trigger an invitation for a live video interview on Spark Hire. If you want to disable this, simply uncheck the box next to it and it will not show up on your scheduling page.
Create new event type
To create a new event type, click Create new event type.
When creating a new event, there are a few default fields you should set. These defaults will be used when someone requests this type of event with you.
Event Name: This is what will appear on your scheduling page. It's what someone will select from your event type dropdown menu when they are requesting a time.
Subject: This text that will populate the subject field of the calendar invitation that's created when you approve an event.
Description: This text will fill out the description section of the calendar invitation that's created when you approve an event.
Location: This text will be added to the location field of the calendar invitation that's created when you approve an event.
Next, click on Continue to configure the event’s scheduling settings.
The Scheduling Settings control how the event type you're creating factors in your availability.
Pooled Calendar Availability: When you have multiple calendars connected to Spark Hire, pooled calendar availability lets you choose how they factor in to your availability. If you select All, this means that you must be available in all of your connected calendars in order for this event type to be requested at a specific time. If you select Any, this means that only one of your calendars needs to have availability for this event type to be requested at a specific time.
Duration: This is the default duration of the event type.
Minimum Notice: This is the minimum amount of time before an event starts that someone can request it. This is helpful so you don't get last minute requests. For example, if you're booking an in-person meeting, you probably don't want someone requesting a start time 1 hour from now. Therefore, you can adjust the minimum notice setting to make sure you have plenty of time to review and approve requests.
Maximum Booking: This is the maximum amount of time in the future that someone can request an event for. Events scheduled far into the future are more likely to be rescheduled or canceled. Plus, why wait so long to conduct an important meeting? Setting a maximum booking length lets you restrict how far out someone can request events for to ensure you limit your cancelations and create a sense of urgency.
Start Time Intervals: This determines how start times will be displayed on your scheduling page when people request events with you. It's really your personal preference on how you like to book your meetings. Some people like meetings to start on the hour so they will set this to 1 hour intervals whereas others like to load meetings back to back and will set it to 15 minute intervals.
After the scheduling settings are set, click on Continue.
You may enable an event to automatically approve requests. To do this, click the toggle button to the left of Enable automatic approval of this type of event.
This will allow you to select the calendar to which you would like the event to appear once requested.
Send an email on approval?
Selecting Yes will allow you to send the event request an approval email. You may use an existing email template from your Library or type a new one.
Create Live Interview?
If you would like to create Live Interviews upon automatic approval, select Yes. This will then provide options to select the job the interview is for as well as whether you would like to turn on guest access.
When you're satisfied with your new event type, click Save.
Editing event types
If you want to edit an event type, click the pencil icon to the right of the event type from your event types page in the scheduler setup.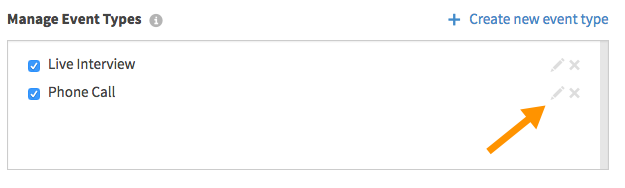
When you're done editing the event type, click Save.
Enable/Disable event types
To enable/disable an event type from showing on your scheduling page, check/uncheck the box next to the event type and click Save.
Remove an event type
To remove an event type completely, click the x icon to the right of the event type. A modal will appear asking you to confirm you want to remove this event type.
Send a scheduler link for a specific event type
In some scenarios, you might want to send your scheduling link to one or more people for a specific event type (e.g. you don't want them to select an event type on your scheduling page.) This comes more into play when you have a bunch of people you want to schedule an event with. You can send specific scheduler links to one or more people at any time. Take a look at this help desk article on how to send scheduler links in bulk to learn more.
Comments
0 comments
Article is closed for comments.